The Ultimate Guide to Printing on Cardstock the Right Way
Recent Posts
-
 Rigid Boxes vs. Folding Cartons:... July 10, 2026
 -
 Custom Boxes vs Stock Boxes:... July 9, 2026
 -
 Cardboard vs Corrugated Packaging: Which... June 29, 2026
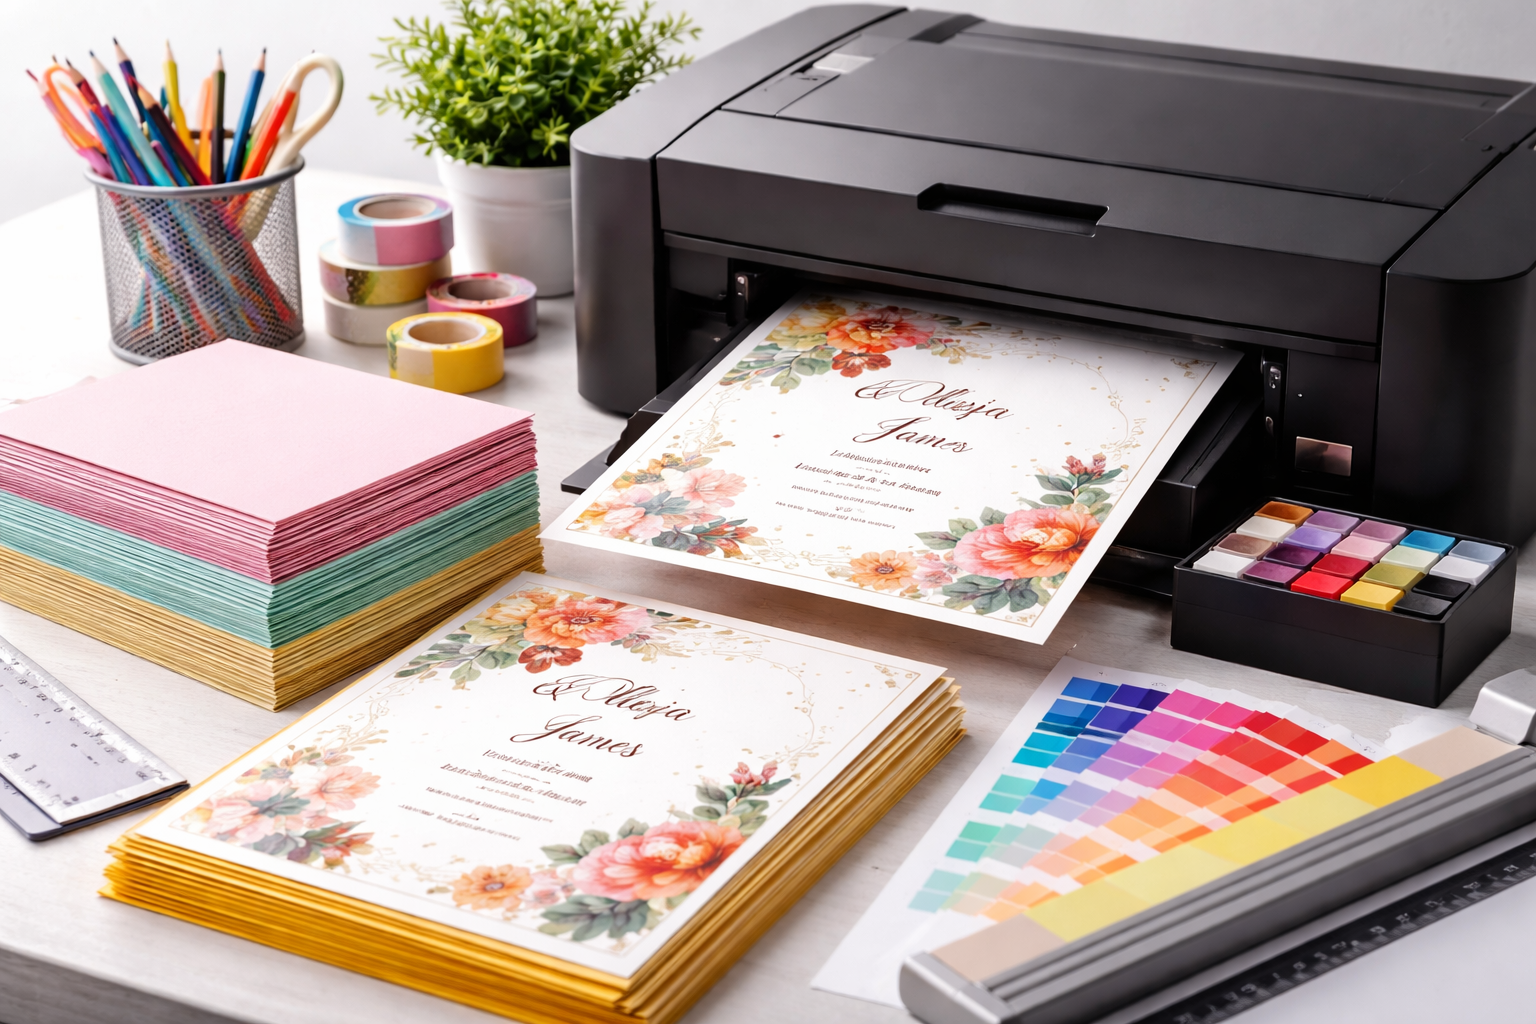
A cardstock is a thick, premium coated paper that can turn a beautiful digital artwork into a tactile experience. But there is a condition that your printer should know how to handle it. Usually home printers that we use are factory-set for copy papers which is lightweight and weighs around 70-90 GSM. However, you can use these printers for printing on cardstock but with a specific set of hardware and software adjustments. Otherwise your printer can jam or ink can smudge because your printer was not set for the heavy paper.
So, if you don’t want to waste your expensive stock, read this blog. We will explain how to bypass the jams, fix the smudges, and print on cardstock for professional-grade results.
Choosing the right cardstock for the printer

You must have heard that “Not all materials are equal”. This is true, especially in the case of cardstocks because when you go to the market to buy the paper, you’ll encounter multiple options based on weight, thickness, and coating. Therefore, before we learn how to print cardstock flawlessly and safely, you must know the basics of your paper. So, take a look into it.
Weight vs Thickness
In the printing world, ‘weight’ refers to the density of the paper where ‘thickness’ means the physical caliper of the sheet or in simple words you can say it tells if the sheet can fit through the narrow gap between the printer’s roller. Weight of a cardstock is measured in Pounds or GSM. Pound is a US standard unit but to achieve accuracy for printing on cardstock GSM is the gold standard. On the other hand, thickness is measured in Points or Mils.
In the market you can find lightweight cardstocks starting from 170 GSM to heavy-duty ones that weigh 250+ GSM. So the question is how to decide which paper will go inside the printer? Well, choosing the “right” cardstock depends entirely on your printer’s paper path. If your printer is designed for a ‘U-Turn Path’ where paper goes in the front and curls 180° to come out the front, then use a 170 GSM paper. But if the hardware has a ‘Straight Path’ where the printer has a tray in the back and the paper curls at 0° then you can use a 200+ GSM cardstock because the paper doesn’t have to bend.
Coated vs Uncoated stock
There are two types of cardstocks based on the finishing which determines how the paper reacts to the ink. One coated cardstock and other is the uncoated cardstock. Uncoated cardstock absorbs ink deeply and creates a matte look. Whereas coated cardstock has a clay-like coating which makes the ink stay on the surface and colors look incredibly vibrant. However, it takes much longer to dry so if you touch it too soon, the paper will smear. Therefore choose the paper according to your desired look.
A step-by-step guide for printing on cardstock
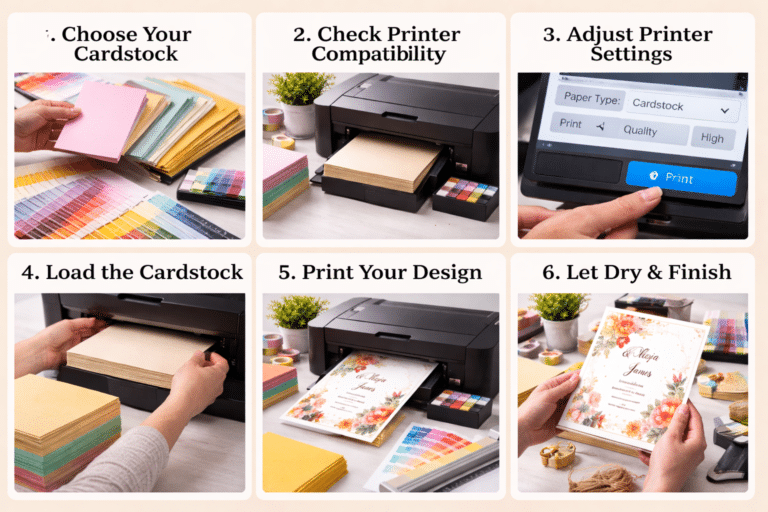
Now that you know which paper weight and coating you need for printing, let’s start with the practical steps. Printing on cardstock isn’t as simple as hitting Ctrl + P. You have to go through a long list of settings to make adjustments for heavy-duty paper. So here is what you need to do.
Change your printer’s setting
Before you print, your printer needs to know that it’s about to handle a heavyweight champion, not a lightweight sheet. Therefore, in your print window, don’t just click “Print.” Look for “Printer Properties” or “Print Settings”. In print settings look for a dropdown menu labeled as “Paper Type.” and choose “Cardstock“, “Premium Matte”, or “Glossy Cardstock”.
Load the printing tray
Cardstock is usually cut in stacks that’s why the edges can sometimes “micro-bond” together due to the pressure of the industrial blade. This causes the printer to grab two sheets at once. To avoid this error take the stack of cardstock and “fan” the edges like a deck of playing cards. This introduces air between the sheets and will break any static or mechanical bond. Also, limit your cardstock stack to 5-10 sheets in a tray to prevent rollers from slipping.
Take a test run
Never, ever use your expensive cardstock for the very first print. First print a copy on standard, cheap copy paper first and hold it over your cardstock against a light source (like a window). This allows you to see if your margins are correct and if your design sits perfectly within the boundary of the paper. When everything is set, simply click on the “OK” or “Print” button to start the printing process.
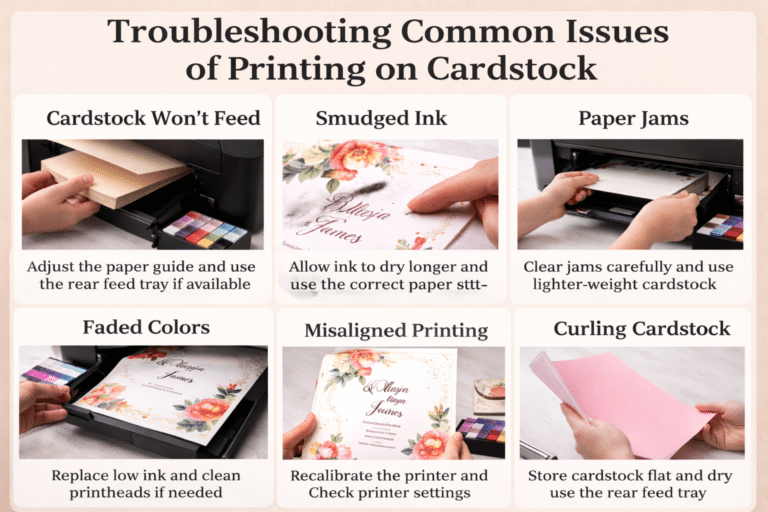
Troubleshooting common issues of printing on cardstock
No matter how advanced your printer is, even the most expensive printers can get “stage fright” when faced with a thick sheet of cardstock. So if you face any mechanical failure during printing, don’t panic. There is a solution for every problem.
Here are a few common issues you might face during the printing and necessary fix for them.
Paper jam
Cardstock can get stuck if it’s too thick or sometimes there is a ‘Ghost Jam’ where the printer thinks there is a jam, but you cannot see it. To fix it, clean your rubber rollers with a lint-free cloth and a tiny drop of rubbing alcohol. Your printer will start working smoothly.
Ink Smearing
If you are using a glossy cardstock, then the ink takes time to dry. What you do is set your ‘Media Type’ to “Labels or Transparency”. This new setting will slow down the print head and allow for air-drying.
Out of paper error
Sometimes the roller can’t grab the cardstock due to the thick edges of the sheet. In such situations give the paper a very gentle nudge. This will help the rollers start to spin and the printer can find its grip.
Color look dull and faded
If your vibrant design looks “ashy” on the cardstock, it’s likely because the porous fibers are drinking up all the ink. Here is how you can fix it. Go into your “Advanced Color Settings” and increase the saturation by 5-10%. Alternatively, ensure you haven’t accidentally selected “Draft Mode” or “Ink Saver Mode”.
Top 5 uses of cardstock
Since cardstock offers a structural integrity that standard paper lacks, that’s why it is the go-to choice for anything meant to be handled, displayed, or kept. Such as:
- Invitations like Weddings, Birthdays, and conferences etc. You can choose heavy, matte white stock cards as they give a premium look.
- Business cards: For business cards, it provides a professional, tangible experience that makes a lasting first impression.
- Scrapbooking and Crafts: For DIY projects you can use the paper studio cardstock. It is thick, durable, and creates an elegant finished look of the project.
- Marketing materials: You can use cardstock to craft items intended to enhance brand identity, such as folders and brochures.
- Custom packaging boxes: You can also use cardstocks for manufacturing premium-quality custom boxes for cosmetics, jewelry, and food items.
Conclusion
Now that you know how to set printer settings, the troubleshooting tips and solutions to expected paper jams, you safely print your invitations, and business cards on cardstock. But don’t forget to follow the printing steps that we discussed above. And if you want enticing invitations or business cards, get them from Boxit Packages. We provide affordable rates with free design assistance.
.jpg)